Restraint & Handling of Livestock
2.0 Restraint & Handling, Aging and Weight 2.1 RESTRAINT & HANDLING OF LIVESTOCK Working with livestock can be dangerous. However, livestock that are treated gently and handled frequently from the time they are babies are usually more tame.
CAUTION!
Any animal can be dangerous when it is frightened, excited, hungry or in pain.
Be especially careful around mothers with babies and adult males during mating season.
There are many local methods of holding and tying livestock. This chapter explains some of the most common methods.
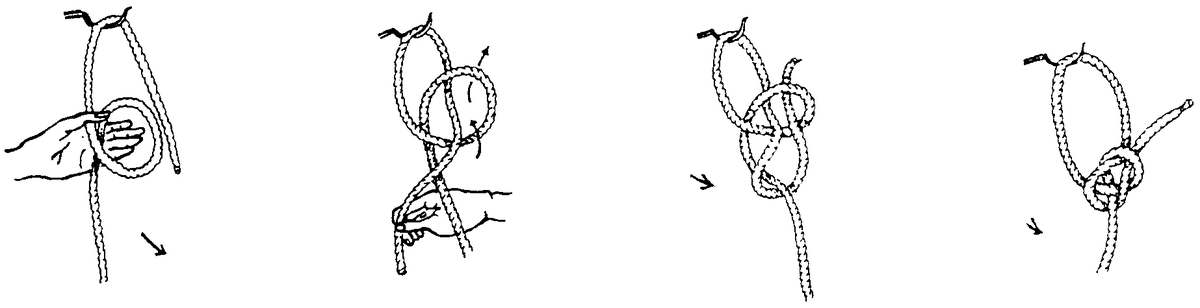
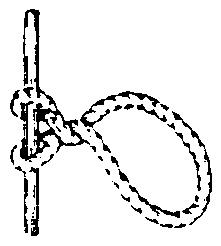
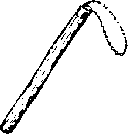
How to Tie a Fixed Knot:
Tying knots around the necks of animals can be dangerous. If the knot becomes tight and the animal begins to struggle, it may be impossible to untie the knot quickly, and the animal may suffocate. The following knot, called a "bowline," can be tied quickly and is a fixed knot so it will not tighten when it is pulled.
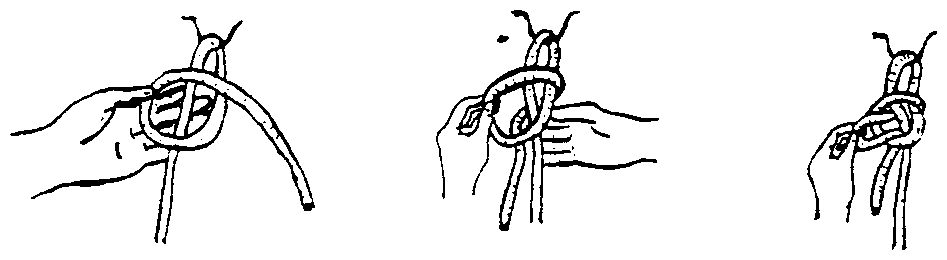
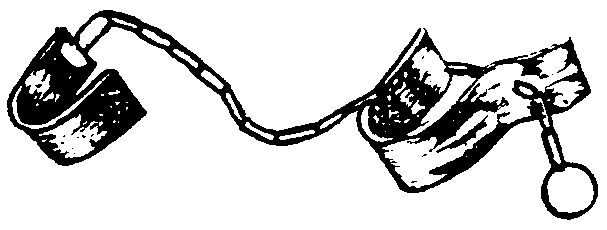
How to Tie a Quick Release Knot:
A quick release knot is one that can be quickly untied if an animal struggles or becomes tangled.
CATTLE AND BUFFALO
A person is more likely to become injured when treating a large, strong animal in a small space. It is better to treat animals in open areas where there is light to see and enough room to avoid being kicked or hit.
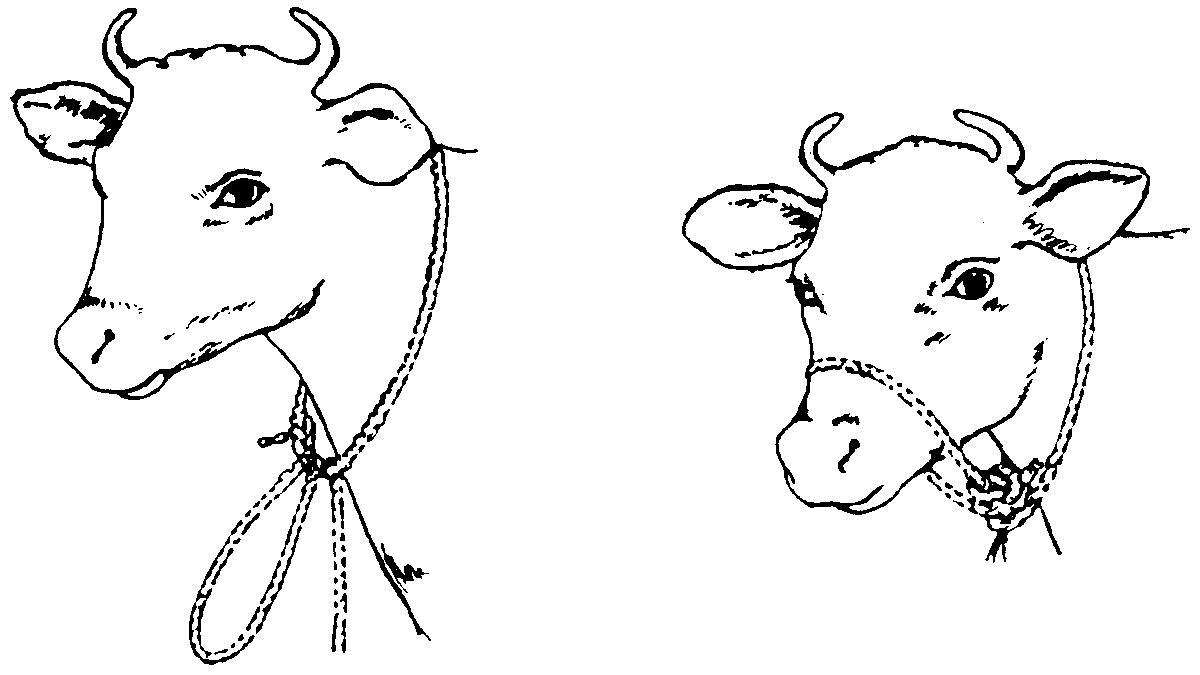
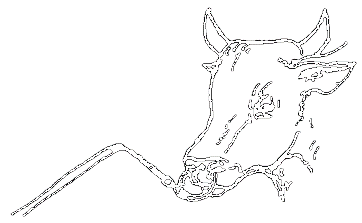
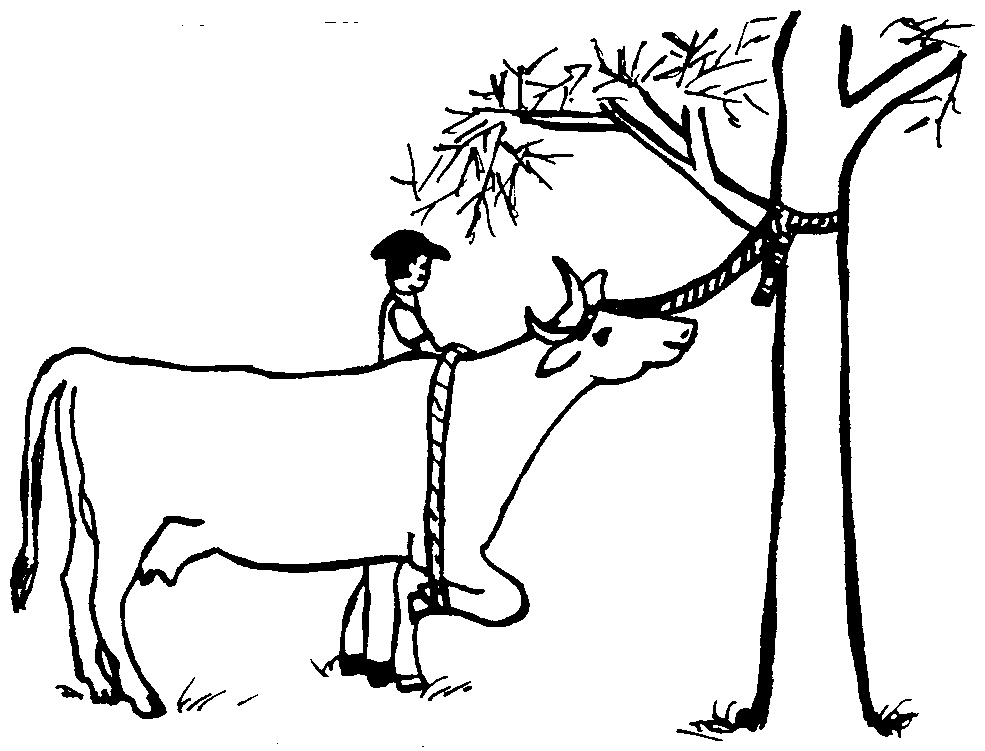
Making a halter Tie a fixed knot on the animal's neck.
Make a loop in the free end, pass this loop through the neck loop and slip it over the muzzle.
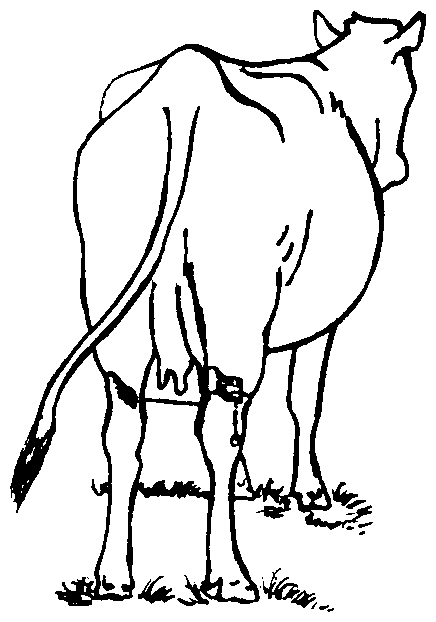
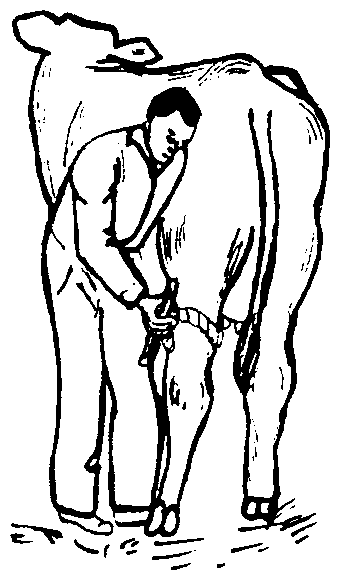
Making a tail tie Tail ties are useful, especially when working alone, to hold the tail out of the way.
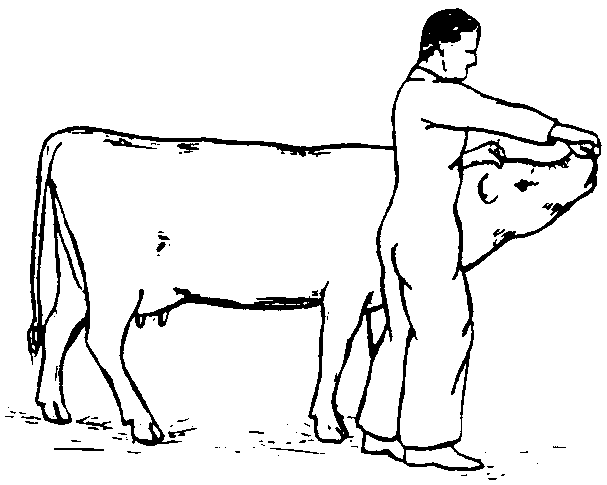
Control by the Nose Since the noses of cattle and buffalo are sensitive, these animals can be restrained by controlling their nose.
Nose Rings When a hole is made in the nose and a metal or rope ring is put through the hole, the animal can be restrained by grabbing the nose ring or attaching other ropes, chains or sticks to it.
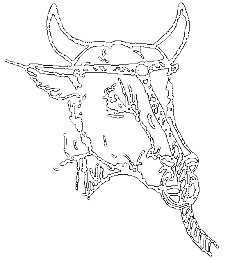

Grabbing the nose with fingers or nose holders The nose can also be grabbed by hand or with special nose holders. Additional restraint is achieved by lifting the tail up.
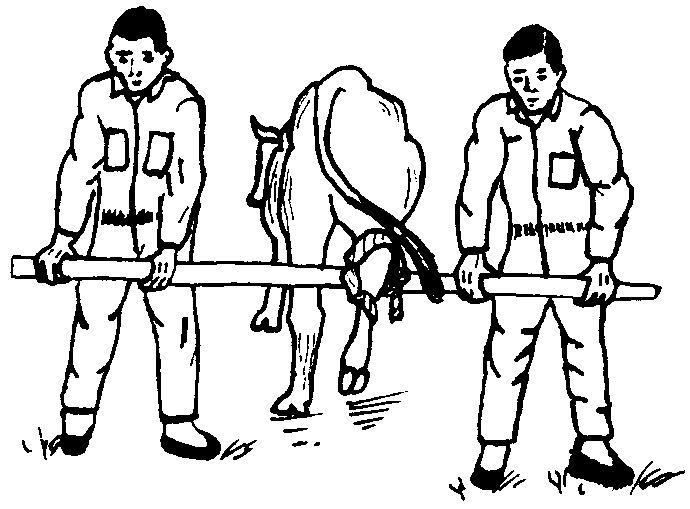
Building a Crate If animals are to be examined, treated, and vaccinated regularly in one place; then it is worthwhile to build a simple crate. A crate should be built on dry, flat ground using local materials such as bamboo or wood. If there is any gradient, animals should enter the crate going uphill. There should be space around the crate for examining all parts of the animal.
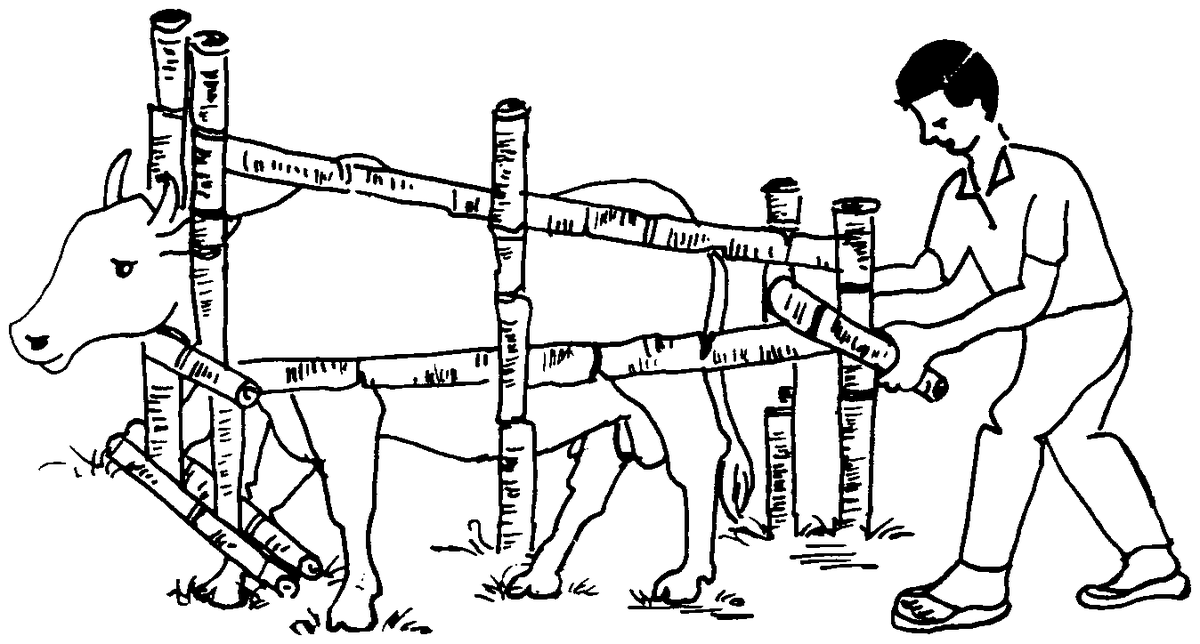
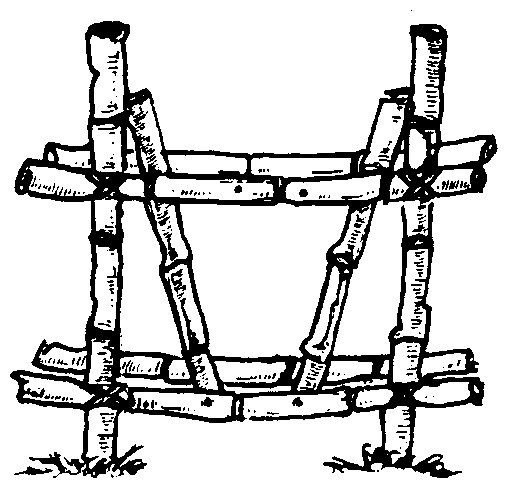
Note: The posts should be sunk at least 60 cm into the ground and preferably one meter to withstand a big, strong animal. If the crate is only for cows or oxen, it can be smaller in size. If it is only for buffalo, it should be bigger in size.
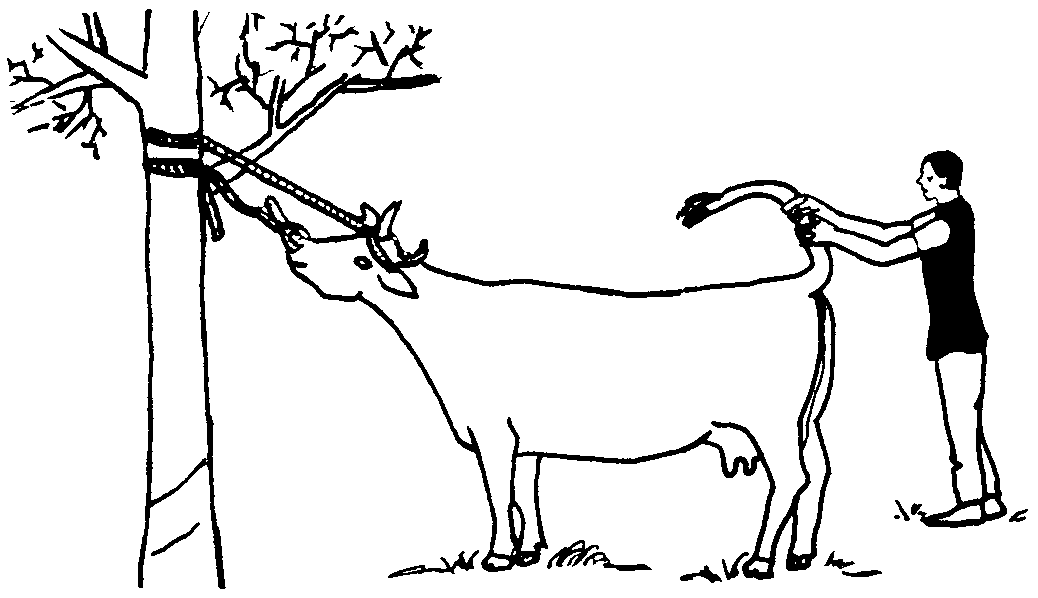
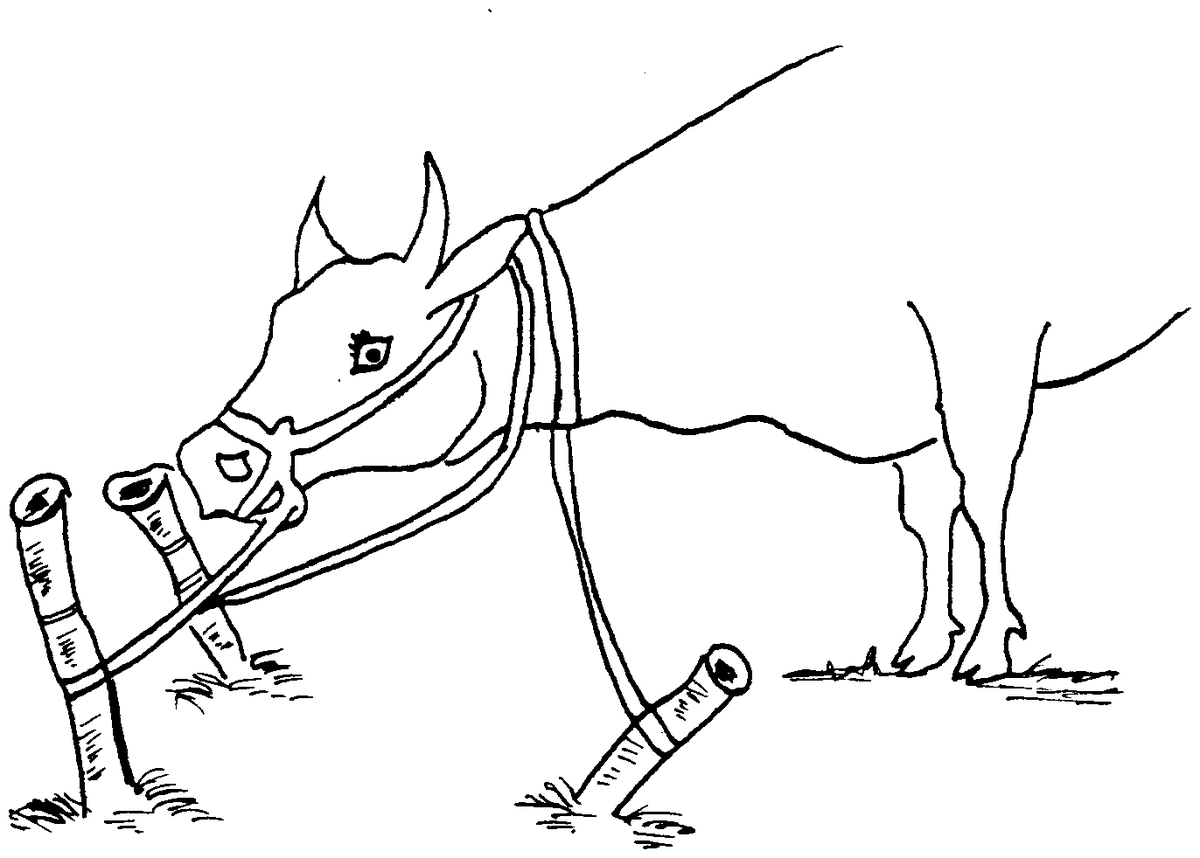
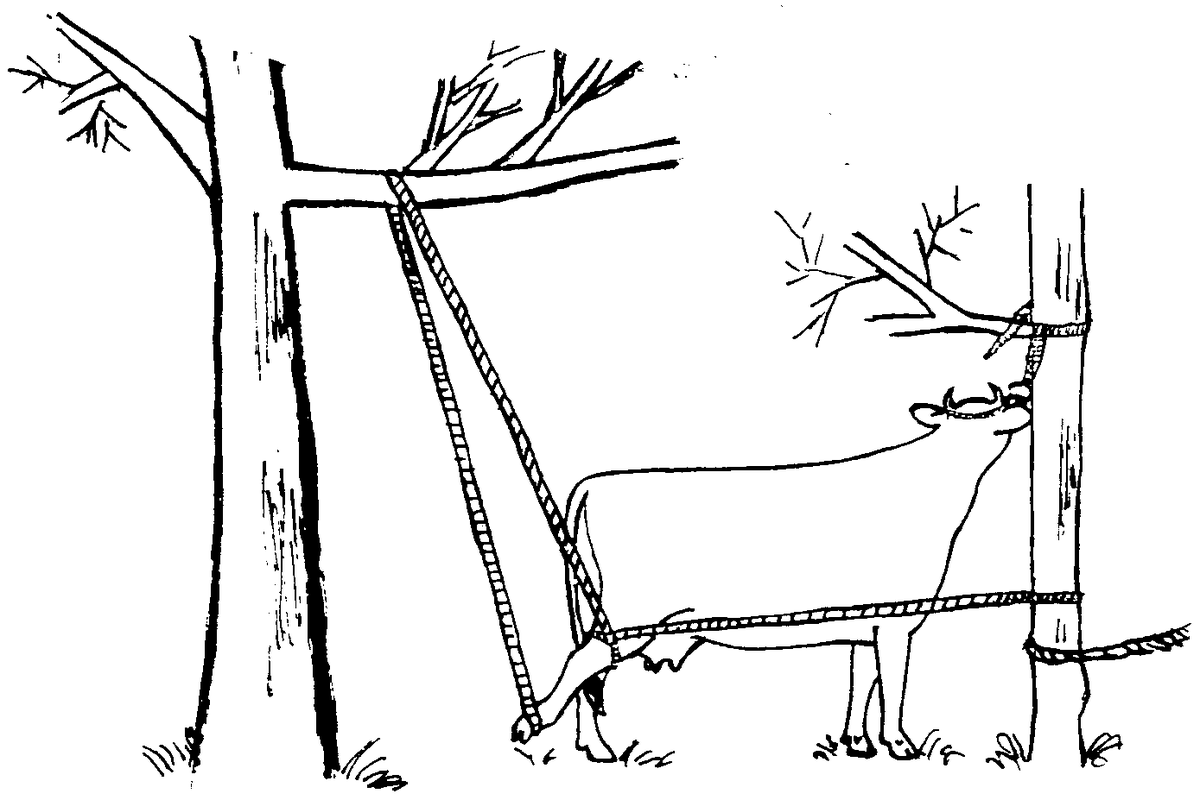
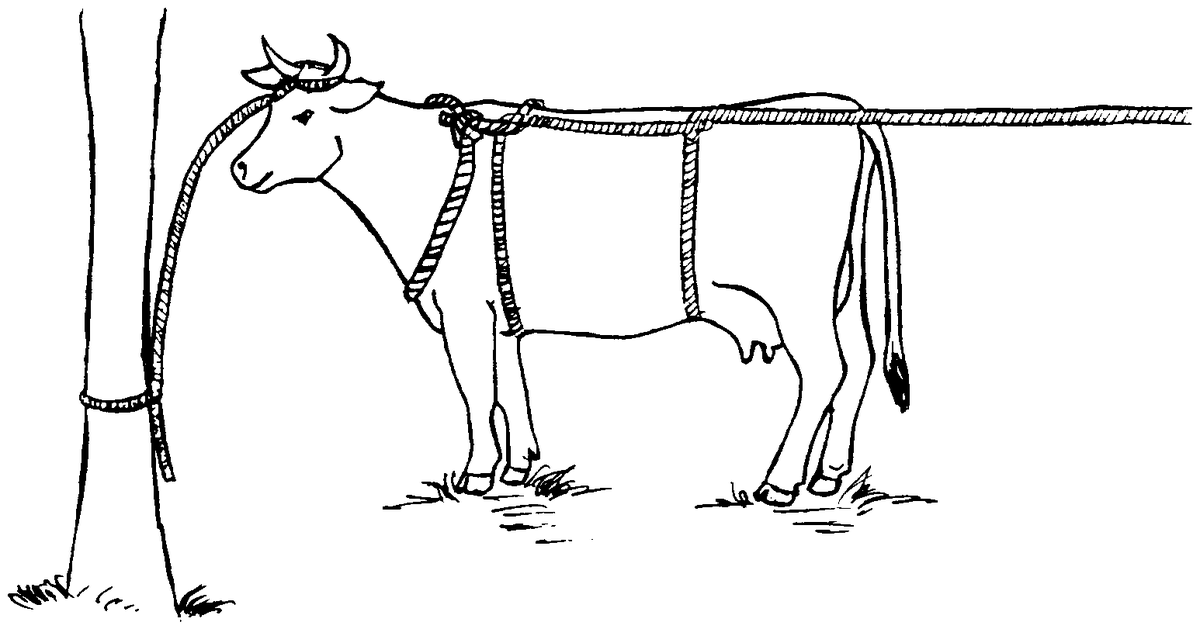
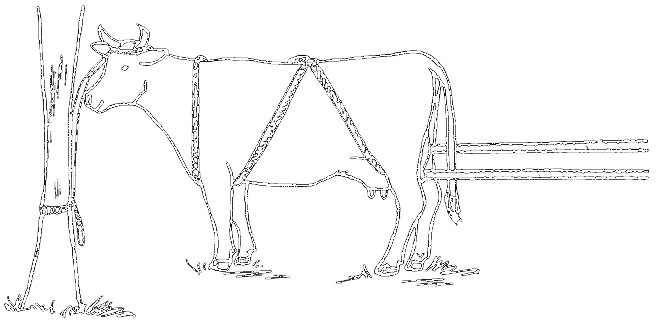
If no crate is available, cattle and buffalo can be tied between two strong posts or trees placed three feet apart. Tie the ropes low to the ground.
To prevent kicking Cattle tend to hit with their heads and to kick, particularly to the side, whereas buffalo tend to hit only with their heads. There are many methods of tying cattle legs and feet, to keep them from kicking.
To lift a leg There are several clever ways to lift front and back legs, in order to prevent kicking.
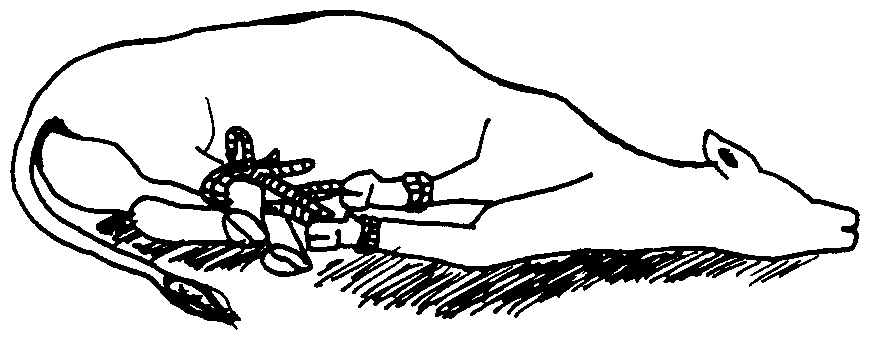
Casting an Animal If no crate is available and/or an animal is difficult to control, the animal should be forced to lie down using ropes. This process is called "casting." Regardless of the method, you will need the following to cast an animal:
The ground should be fairly level and soft - without rocks or sticks that could injure an animal when it falls down.
A short rope or halter is needed to hold the head.
A soft rope is also needed which is at least 12-15 meters long (35 feet). The rope should be at least the width of your finger. Nylon ropes, although strong, are not ideal because they can wound the skin. Cotton ropes are ideal.
At least two to three people are needed. One person will be needed to jump on the animal as soon as it lies down, and hold down its head. At least one strong person (preferably two or three) will be needed to pull on the rope.
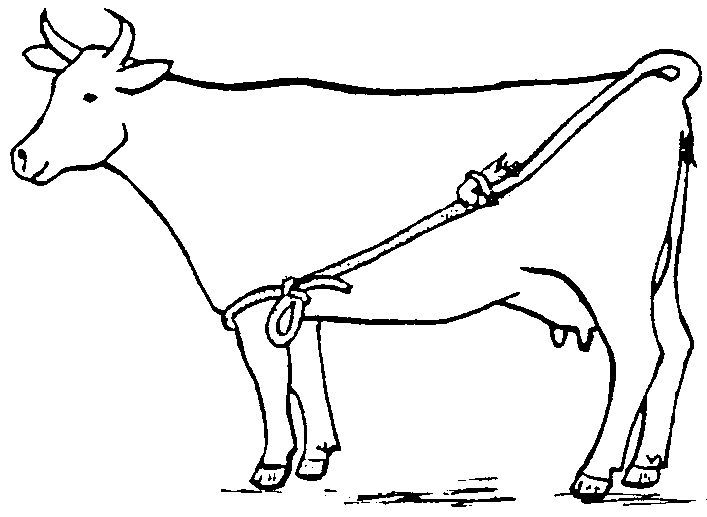
The Two-Loop Method for Adult Cattle and Buffalo 1. Using the short rope and a fixed knot, tie the animal’s head or horns to a strong post or tree. The rope should be tied at the base of the post or tree - i.e. near the ground, otherwise you will "hang" the animal.
2. Pass a long rope around the animal's neck and tie a bowline knot - i.e. a knot that does not tighten once it is tied.
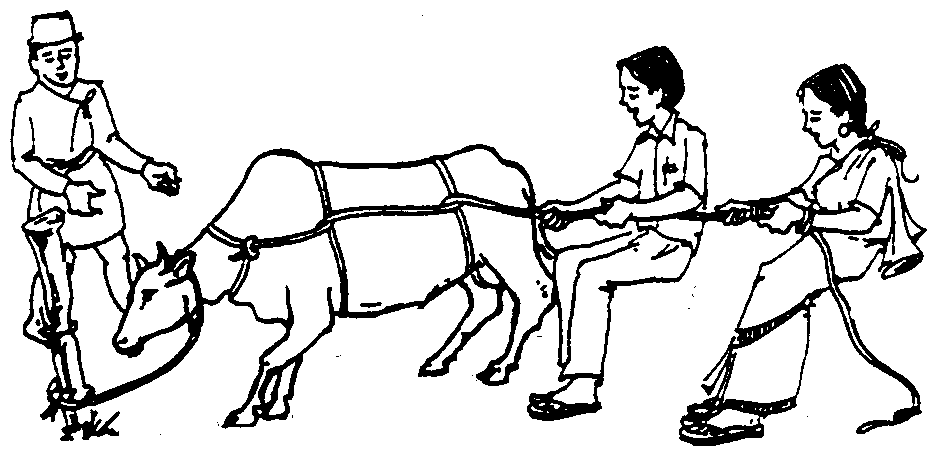
3. A person standing on the left side of the animal should pass the free end of the rope over the back of the animal, to another person standing on the right side of the animal. This second person should pass the rope back under the animal's body to the person on the left hand side, completing a loop around the animal's chest (just behind the front legs).
4. Pass the rope around the animal's body again and back over the top to make a second loop around the body, just in front of the hip bones.
5. Have one or two people pull on the free end of the rope and the animal should lie down.
6. Once on the ground, the animal's head and neck must be held firmly to the ground. If its head is held firmly, the animal cannot stand up and will usually stop struggling.
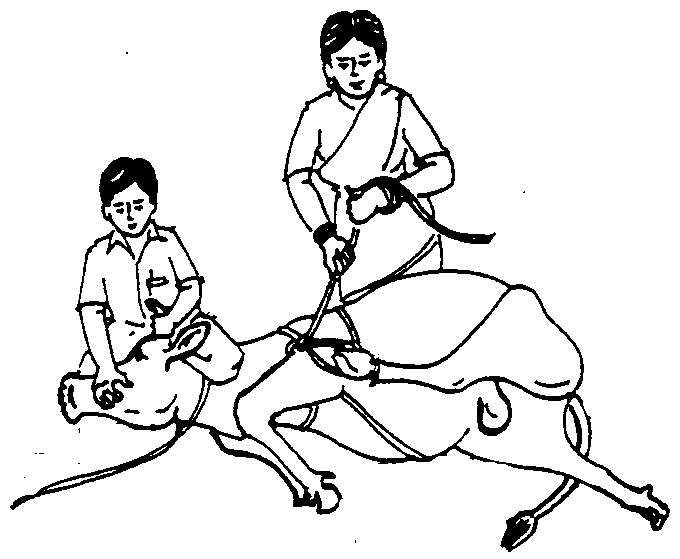
7. Once the animal is lying down, the legs can be tied together using several methods. This will prevent kicking and will make castration or examination of the udder much easier.
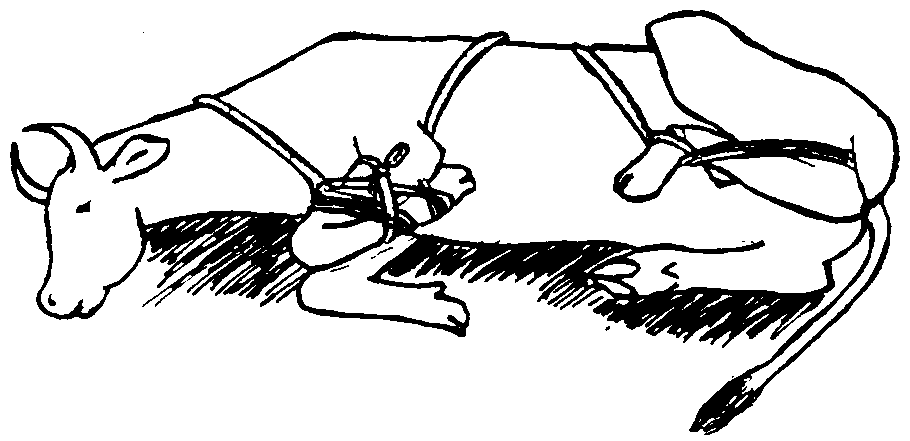
Method for tying large cattle Method for tying a calf The Criss-Cross Method for Adult Cattle and Buffalo For some cattle, this method works better because it does not pinch either the udder or the penis of the animal. Using the short rope, tie the animal's head as described above.
1. Fold the long rope in half.
2. Place the middle of the rope over the neck.
3. Cross the ends under the neck.
4. Pass the ends of the rope back inside the front legs, up over the back and cross them again.
5. Pass both ends of the rope down the sides of the animal and inside (between) the back legs.
6. Pull both ends of the rope to force the animal to lie down.
7. Once again, it is important to tie the legs securely to prevent the animal from kicking and attempting to get up.
| CALVES | 4. Lift the calf using your right knee and right arm. |
|---|---|
| Calves which are light enough to lift off the ground can be easily laid on their side. | 5. Slide it to the ground down your right leg. |
| 1. Stand on the left side of the calf. | 6. Kneel firmly on its neck with your left knee just behind its ear. |
| 2. Hold it under the throat with your left hand. | |
| 3. Hold the skin in front of the hind leg with your right hand. |
HORSES, MULES, & BURROS
Horses, mules and burros can seriously injure people who are unaccustomed to handling them or are not careful. Unlike cows, they can strike with both front and hind feet. Whereas cows usually kick to the side, horses usually kick straight back with their hind feet.
It is better to handle horses, mules and burros in an open area instead of a crate since they are more prone to panic and struggle. The key to handling horses is to make slow, deliberate movements around them and avoid surprising them with sudden noises or gestures, or by suddenly approaching or poking them. Horses do not see well, particularly straight in front of them, so approach them from the side. Talk quietly while working so they know where you are at all times.
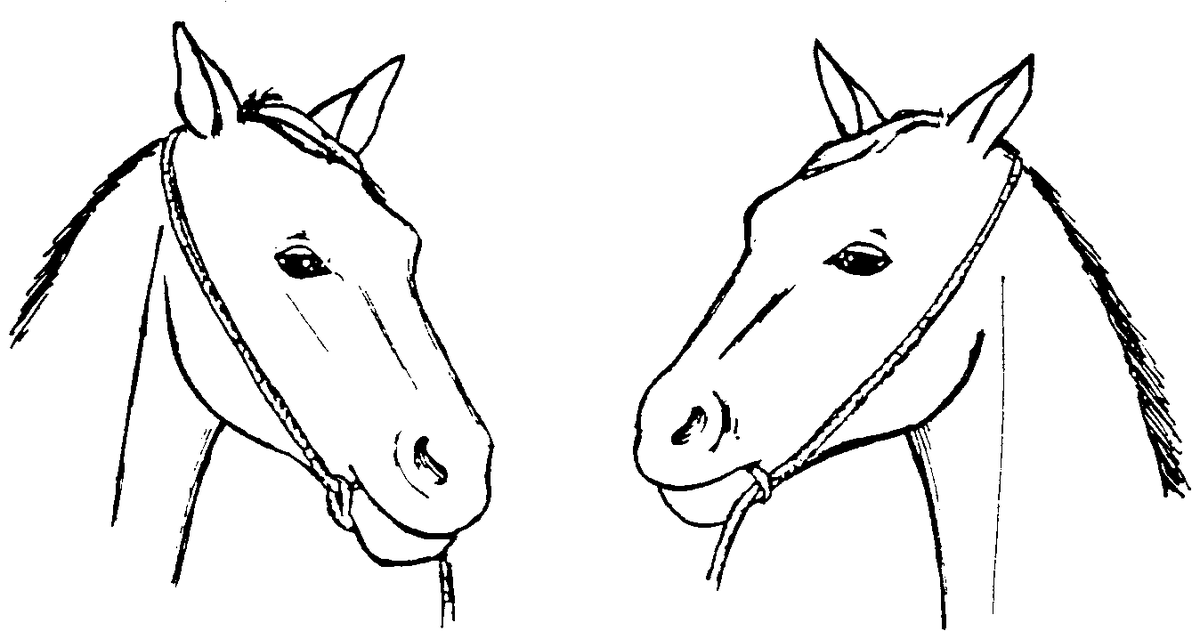
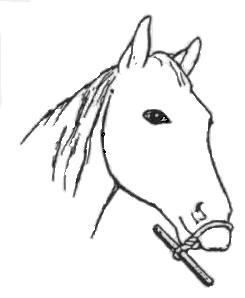
Halter Gentle horses, mules and burros can be restrained using a halter with a rope attached to it to control the animal's head.
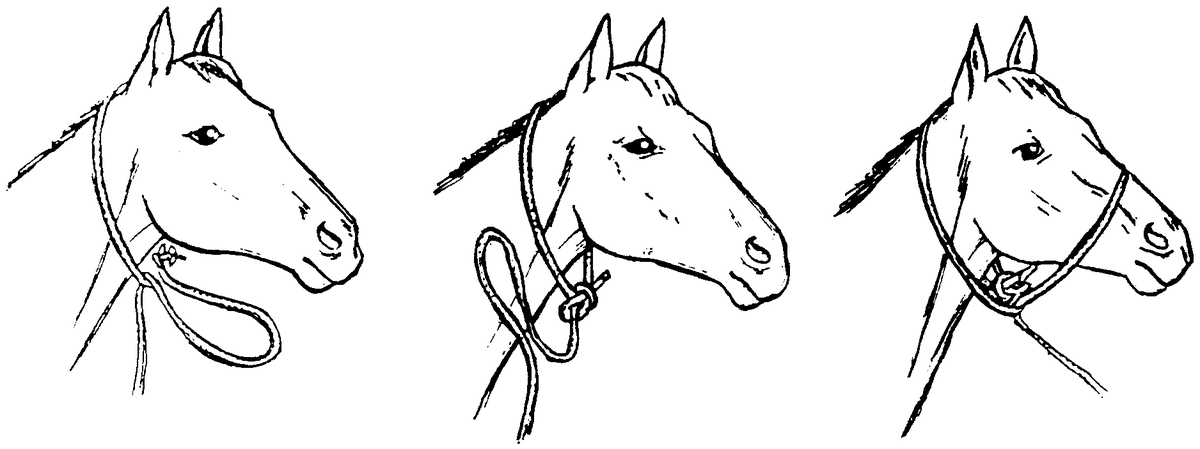
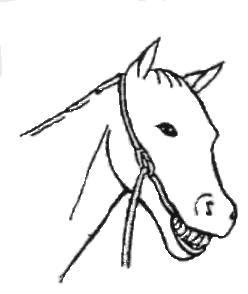
Twitching Horses, mules or burros that are nervous, which will not hold still or are likely to react during a certain procedure or treatment, can be restrained using a "twitch." A twitch can be made with small loop, made of rope or chain, attached to the end of a stick. When placing a twitch on a horse, mule or burro, always stand to the side of the animal's head and never directly in front of it to avoid being struck by its front feet. Place the loop around the upper lip and twist the stick until the loop tightens. Do this slowly and deliberately to minimize a bad reaction. Once it is tight, the horse, mule or burro is usually well restrained. Stay to the side of the animal at all times while using the twitch.


Casting A Horse For some procedures, like castrations, it is necessary to cast a horse and tie its legs. Use a soft cotton rope (if possible) at least 15 meters long and one finger-width in diameter.
1. Tie the horse to a strong post with a short rope attached to its halter or around its neck using a bowline (i.e. non-slip) knot. Tie the rope low on the post, near the ground.
2. Take the long rope and tie the middle portion of the rope around the neck of the horse, using a non-slip knot. The rope should be fairly low on the neck, near the chest.
3. Pass each of the two free-ends of the rope along the sides of the horse’s body.
4. Pass these ends on towards the back of the horse and make a loop around each hind leg, just above the hoof. Some owners prefer to wrap a rag, towel or leather band around the back legs before casting to avoid rope burns.
5. Pass the free ends of the rope up alongside the body, and then slip the ends of the rope under the rope that is around the neck.
6. Pass the ends of the rope towards the back of the animal.
7. Have two or more people pull on the ropes until the horse "sits down." Then roll the horse onto one side.
8. Have another strong person immediately grab the head and hold it firmly against the ground. The horse cannot stand up when its head is held on the ground.
9. The rear legs of the horse should be tied firmly in place, wrapping the ropes thoroughly around the hock (knee) and fetlock (ankle). The rear legs can be pulled forward along the horse's side or tied to the front legs.

SHEEP AND GOATS
Sheep and goats are easier to handle due to their smaller size. As with other animals, sheep and goats should be handled as gently as possible. Too much stress from rough handling can kill a goat or sheep.
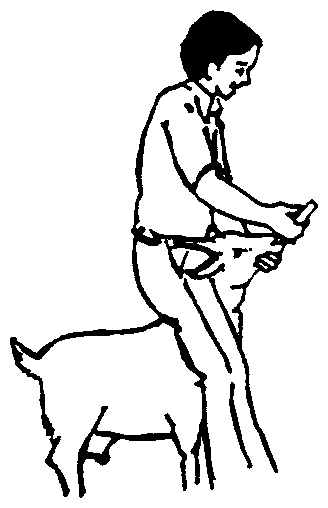
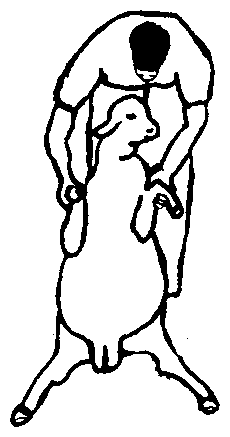
Feeding medicine to sheep, goats, & small calves 1. Hold on to the head, and back the sheep, goat or calf into a corner.
2. Continue holding the head and straddle the animal's neck such that the back of your knees are in front of the sheep's shoulders. Once your legs are blocking the animal’s shoulders (so it can't move forward), your hands are free to work.
Another method of restraining sheep and small goats (This method is not for large goats).
1. While on the left side of the sheep, place
your left hand under the jaw of the sheep and your right hand behind the sheep to keep it from going backwards.
2. With your right hand, grasp the fold of skin directly in front of the rear leg.
3. Lift the front of the sheep off the ground, mostly with your left arm, and, with the help of your right arm, place the sheep's rump in a sitting position on the ground.
4. Hold the sheep between your legs in a sitting position. As long as it cannot place its feet firmly on the ground, it cannot get
up and it usually will not struggle to get up.
Note: For fat-tailed sheep, lean them to one side.
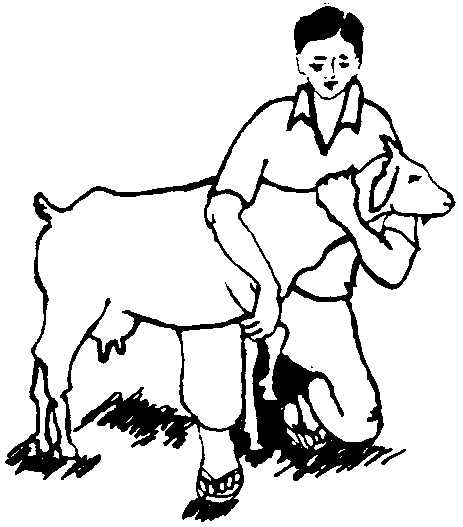
For large, gentle goats Larger goats, particularly dairy goats that are accustomed to being handled, can often be restrained by simply holding their head firmly. Sometimes lifting one of their front legs also helps to restrain them.
PIGS
Mother pigs (sows with babies) and adult males (boars) are unpredictable and often dangerous since they may attack and bite when they are upset or protecting their babies.
Handle pigs as gently as possible, particularly in hot weather. Pigs of all ages can overheat if they struggle, and can even die from heat stress. If boars overheat, they can be sterile for several months. Sows easily overheat when giving birth. In hot weather, pigs should be handled during the coolest parts of the day, that is, early morning or evening.
Small and Medium-Sized Pigs: (for castration)
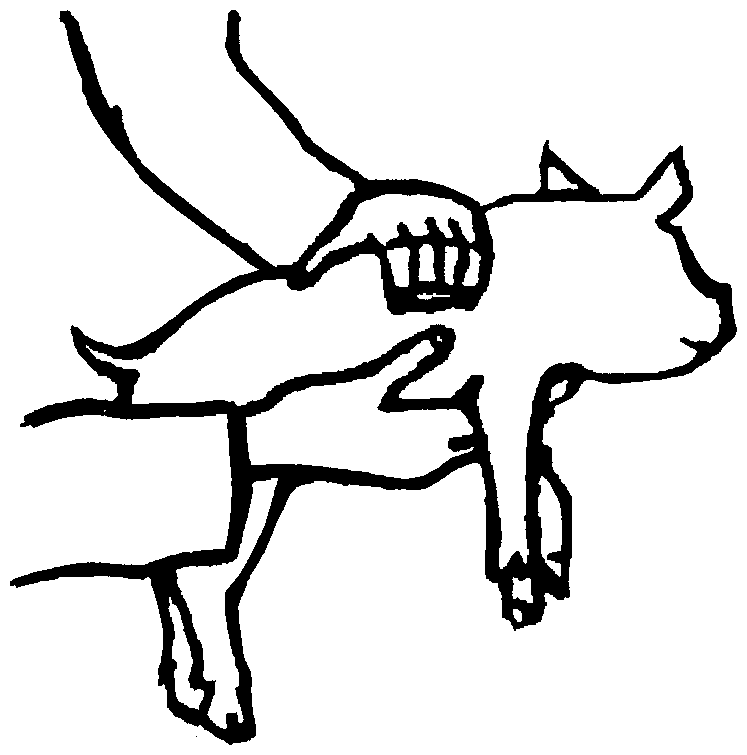
1. While standing behind the pig, grab one or both hind legs, or with both hands grab the pig just behind the shoulders.
2. Hold it by its hind legs so that it hangs down with its belly facing away from you.
3. Steady the pig by holding its shoulders between your knees. See castration, page 173.
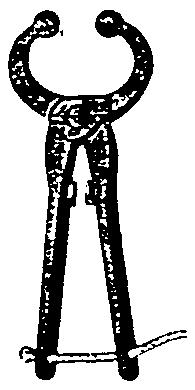
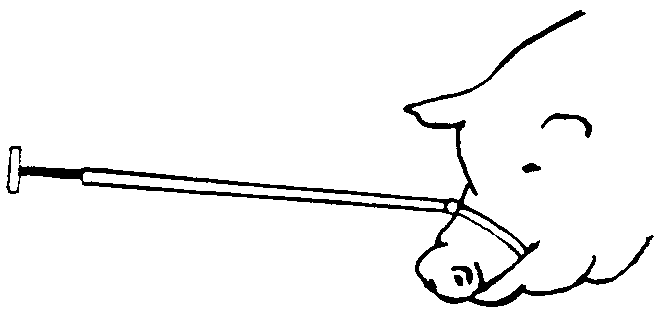
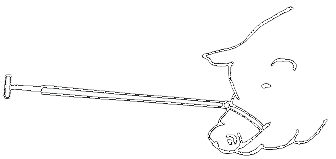
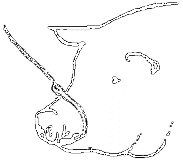
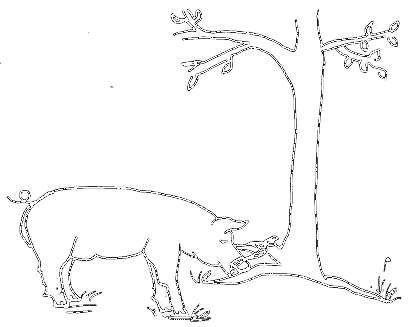
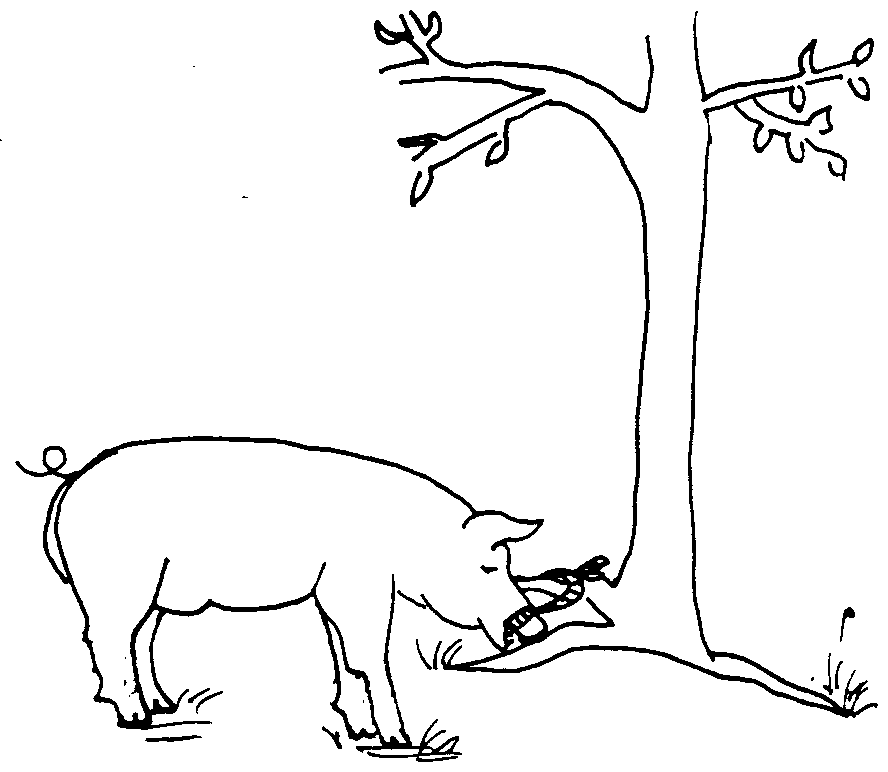
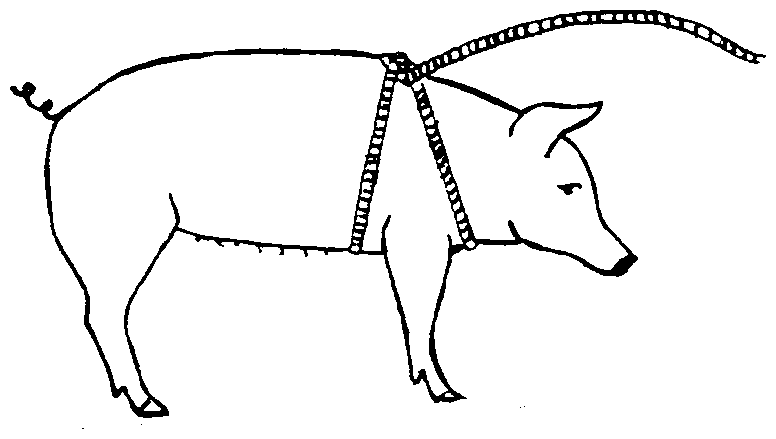
Restraining Big Pigs Using a Rope or Snare Ropes and snares are used for larger pigs. A snare keeps the pig more at a distance. When using a rope, it must be at least ten feet long and the diameter of your finger. The rope should have an "eye" on one end, and the free end of the rope should be passed through the eye to make a loop. Approach the pig from behind and place the loop over the pig's snout and into its mouth. Move the rope behind the large canine teeth and tighten the loop. Tie the rope securely to a tree or post. For maximum restraint, tie the rope to the root of a tree, or low down, so the pig’s snout is touching the ground. A snare can be used in the same manner except that it cannot be tied to a tree or post.


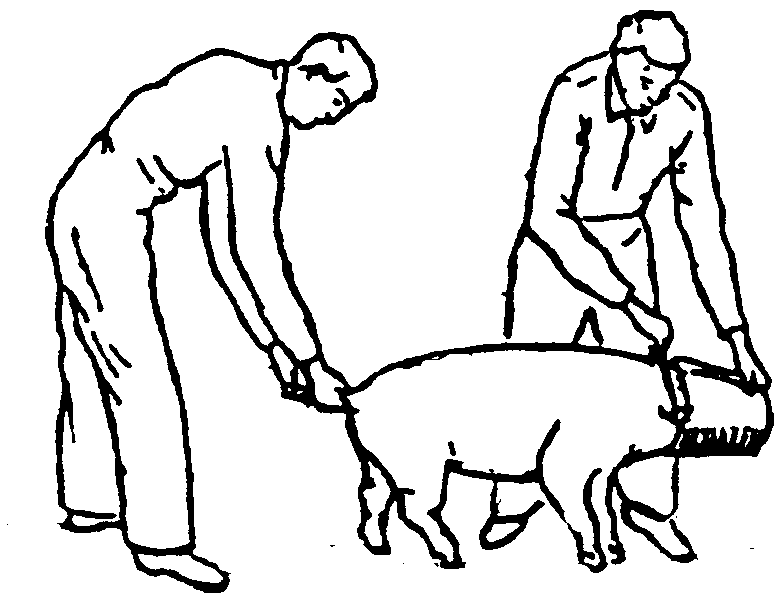
Method of moving a large pig using a bucket:
Pigs will usually back up when they cannot see ahead. Place a bucket on their head and guide them by pulling on their tail.
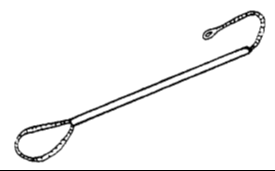
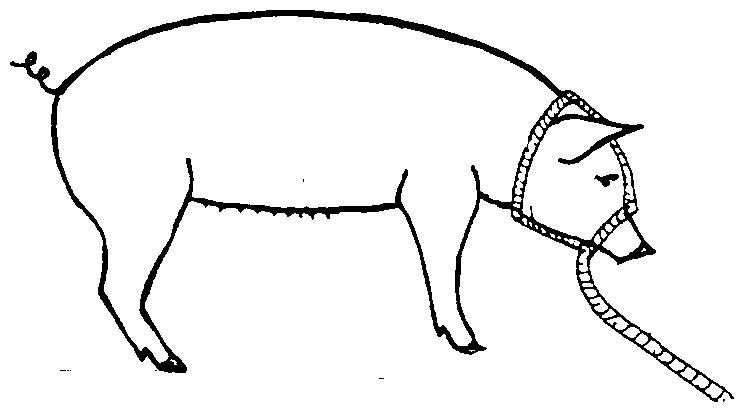
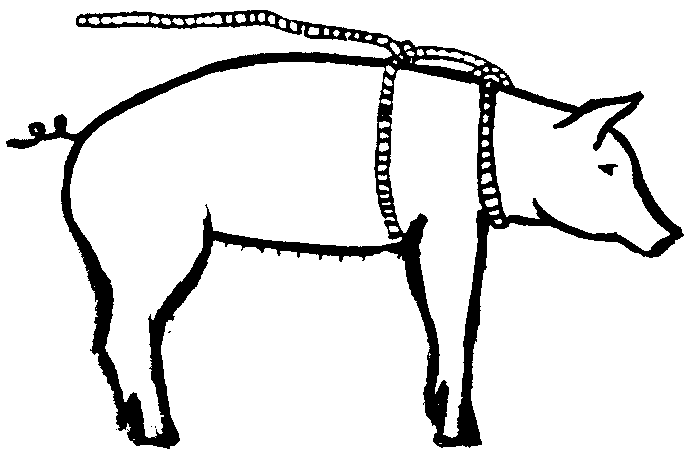
Methods of safely tying pigs so they cannot slip out of a rope or suffocate by strangling.
RABBITS
Grasp the rabbit gently by the loose skin on the back of its neck.
Lift it up, immediately grab the back legs (to prevent it from scratching you) and support its back end so the rabbit feels secure.
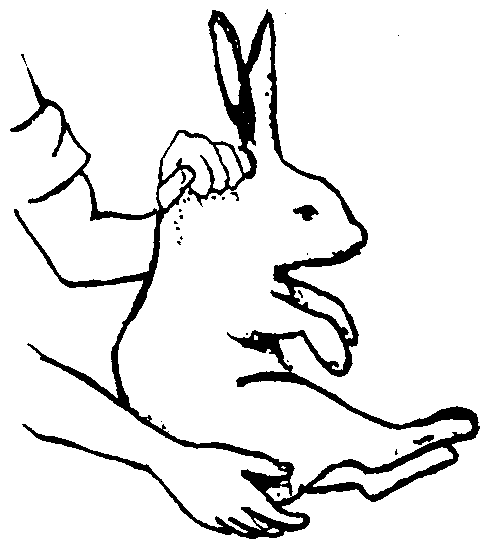
After catching the rabbit, the rabbit can be tucked gently under your arm in order to restrain it. This is a common method of restraint when determining its sex.
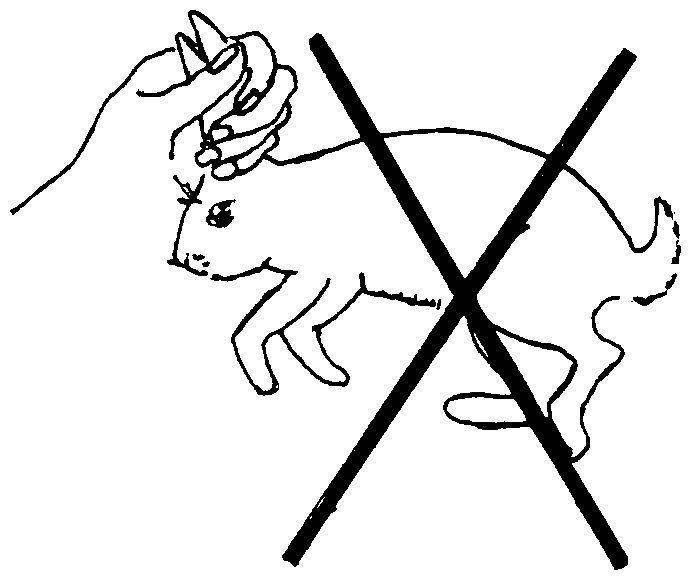
| A rabbit must not be picked up by its ears, because it might struggle & break its back. |
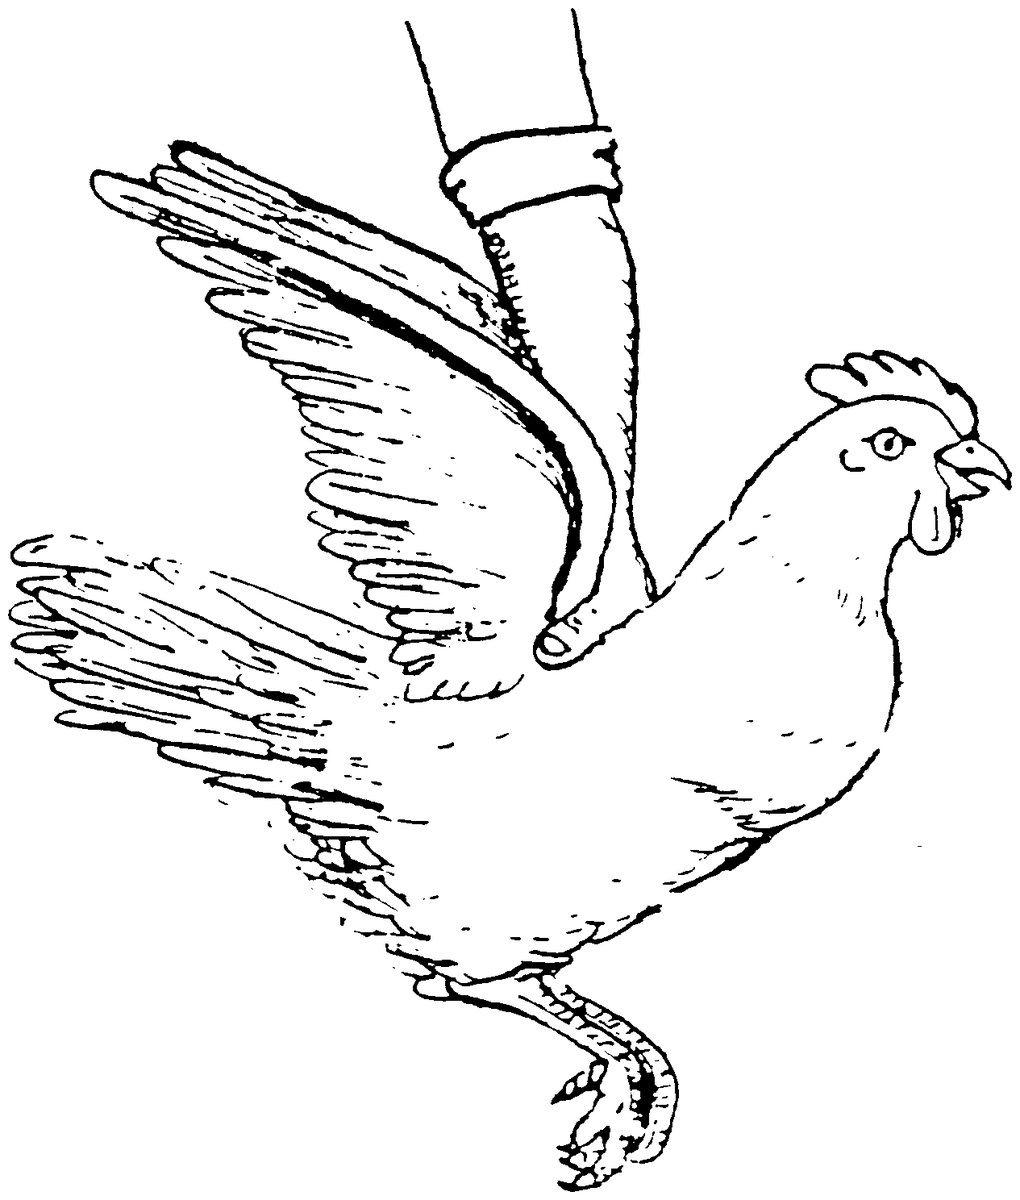
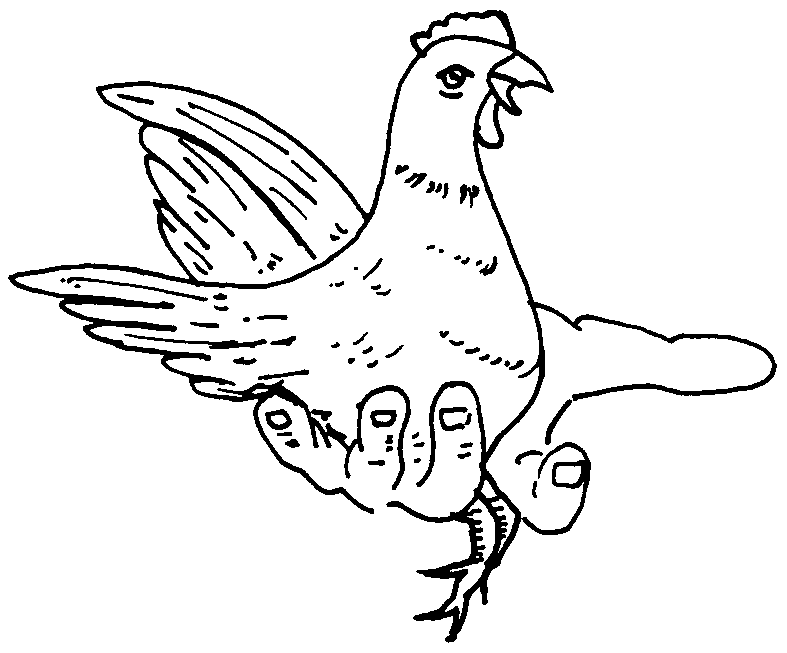
CHICKENS
To handle its head, sit the bird's breast on the palm of your hand and hold the legs between your fingers.
For injections in the breast muscle, turn the bird over and hold its wings between your fingers.