Types of suture patterns
14.3.2 Types of suture patterns Simple interrupted suture pattern: This pattern works well for muscle and skin. It is very strong but it takes more time to complete than other suture patterns.


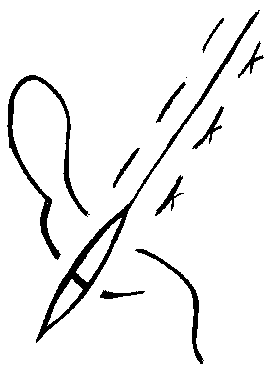
Push the needle through one side of the layer of tissue (use needle holders, if available) near the edge of the wound.
Push the needle through the layer of tissue on the other side of the wound.
Pull the suture tight enough to bring edges of the wound together (but not so tight that the wound is “puckered” or “wrinkled”).
If using nylon suture, be sure to tie it in at least three knots to prevent untying.
The stitches should be approximately 5mm apart in small animals and 10mm apart in large animals.
Simple continuous suture pattern: This pattern works well for muscle and skin also. It is not as strong as interrupted sutures but can be completed more rapidly.


Push the needle through one side of the layer of tissue (with needle holders or pliers, if available) near the edge of the wound.
Push the needle through the layer of tissue on other side of the wound.
Continue this process without tying a knot until you reach the end of the wound, drawing the suture tight enough to pull the edges of the wound together (but without “puckering” or “wrinkling”).
Each suture should be 5 mm apart for small animals, and about 10 mm apart for large animals.
At the end of the wound, check the whole line of stitches. They should be tight enough to pull each side of the wound together so that the sutured wound lies flat and smooth. If not, adjust the sutures (i.e. tighten or loosen them accordingly).
Tie a secure knot. Tie nylon with at least three knots because it is slippery and easily becomes untied.
Mattress suture pattern: This is a good, strong suture pattern for thick skin on animals like cattle and buffalo and can be completed rapidly.


Push the needle through one side of the layer of tissue near the edge of the wound.
Push the needle through the layer of tissue on the other side of the wound.
Push the needle through the layer of tissue again on same side.
Push the needle on through the layer on the other side of the wound also.
Pull the suture so that the skin comes together.
Tie securely, (tie nylon at least three times.)
Repeat the process to the end of the wound.
Local anesthetic is used to reduce suffering of the animal while suturing or during minor operations. It is usually injected under the skin, making it numb so that the animal feels little to no pain. Because the animal does not feel pain, it moves or reacts less to the needle sticks, allowing the work to be completed more efficiently and safely. However, the first injection of the local anesthetic itself is a painful thing (but less so than multiple needle sticks when suturing)! Therefore, small wounds are often sutured, and abscesses are often opened without using local anesthetics.
Several local anesthetics are available including lidocaine, Novocain, lignocaine, and bucaine. These local anesthetics are usually available in about 2% solutions. If they are more concentrated than this, then dilute them with distilled water to about 2%.
Procedure:
Clean the skin with soap and a disinfectant.
Clip/shave the hair from the injection site (or from the edges of the wound) and clean the wound properly (as described in the preceding section on suturing a wound).
Use a needle about two inches long and 18 or 20 gauge in diameter. Be careful to properly restrain the animal and warn everyone around the animal that it may react to the pain when the needle is inserted.
Starting from the wound edge, insert the needle about one inch directly into the tissue under the skin. Once the needle is inserted, begin injecting the anesthetic while simultaneously withdrawing the needle slowly so that the anesthetic is given in a trail along the edge of the wound. Inject along the entire edge of the wound where the sutures are to be placed. It should require about two cc of anesthetic for every inch or so.
Once the needle is completely withdrawn, insert it again in the same manner, but this time, insert the needle in an area that is already numb (so that the animal feels less pain). Continue spreading the local anesthetic along the edge of the wound.
Wait for several minutes and test the skin by pricking it with a needle (but be careful that the animal does not injure anyone!). When the animal no longer reacts (i.e. the edge of the wound seems numb), the suturing can begin.

Place local anesthetic along the wound edge, to decrease the pain during suturing.